Are you looking for the best image optimiser for WordPress?
A powerful and highly functional image optimiser plugin is all you need for compressing full-size images, converting .png files to .jpg formats, and so on.
When you conduct an online search for WP image optimisers, there are so many option, it gets confusing and overwhelming. Based on the user experience of thousands of site owners, we decided to try two of the most popular image optimiser extensions for WordPress sites: ShortPixel and WP Smush.
We have used both of them on multiple sites. Both of them offer a free version (with limited facilities) and premium packages with a suite of power-packed features.
Based on the findings, here is our WP Smush vs. ShortPixel comparison of both free and paid versions.
ShortPixel vs Smush- Free Version
ShortPixel’s free plan can be a convenient choice for new websites with fewer images. You can work with up to 100 images per month on a free subscription plan.
You can compress unlimited photos on Smush Free lifelong. However, there are some limitations. The free version allows you to work with images with file sizes of up to 5MB.
Following is an overview of what you can get using the ShortPixel and WP Smush free plans.
ShortPixel vs. WP Smush Pro- Paid Upgrade Options
For the premium versions, we have evaluated the two plugins on various parameters- features, ease of use, performance, pricing, etc. Dive in to find everything about the paid plans:
Phase 1: ShortPixel Image Optimizer (IO) vs. Smush Pro- Features
The premium plans give you access to an array of high-end features that make strenuous image processing a breeze. Check all of them carefully to decide on the one that meets your requirements.
WP Smush Pro- Key Features
Super-Smush 2x Compression- Use only half the space for your images with the advanced compression algorithm.
Single-Click Smush for Unlimited Images- The pro version allows you to bulk smush unlimited photos on your website with an easy one-click function.
Smush CDN- With any of the premium plans, you get up to 10GB monthly bandwidth and process images from 45 locations across the globe. More bandwidth can be purchased as an add-on if required.
Backup- Store original full-quality images in the library and restore them whenever required.
Google-Recommended Image Size- This is an automated feature to resize and scale the website images at a click as per Google recommendations.
Unlimited File Size- Smush Pro allows you to compress large image files of any size in a few seconds.
CDN/Local WebP- Automatically compresses images to 25% smaller size and saves more space with automatic conversion to modern WebP image formatting.
Automatic PNG to JPEG Conversion- Converts PNG files to JPEG format automatically without changing the quality of the images. Note that if you are using transparency in your PNG images you will lose this by converting them to JPEG.
Lazy Loading- Select custom loading animations and delay offscreen image loading until users actually scroll down to them, helping to boost your site speed.
ShortPixel Image Optimizer- Key Features
Compression Types- You may choose to compress the images in lossy, glossy, or lossless types from the settings.
Lossy/Lossless Compression- Supports and compresses JPEG, PNG, WebP, GIF, PDF, and AVIF image formats.
CMYK to RGB- You can use this feature to adjust the photo colours for the best appearance on web/mobile devices.
Compress 100MB Image Files- ShortPixel supports image file size of up to 100MB which is enough for compressing large images.
Large Image Scaling and Compression- The image optimiser plugin automatically scales and compresses large images.
Integrate Your Site to Cloudflare- This plugin allows you to integrate seamlessly with the Cloudflare website security infrastructure.
Multiple Image Optimization Levels- Depending on your file size and other properties, you may select the image optimization level from the dashboard.
Automated Backup Support- ShortPixel creates an automatic backup file for all your images. You can avail of them at any time from the library.
Note: ShortPixel IO cannot process CDN. You may use the ShortPixel Adaptive Images plugin for this purpose.
Verdict: When you compare the features of the ShortPixel image optimiser and Smush Pro, there are a few considerations to impact your choice.
- ShortPixel supports compression for image file size of up to 100MB. With Smush Pro, you can compress images of any size.
- With any of the pro plans, you can avail CDN from 45 locations worldwide. You also get 10GB bandwidth per month.
- If you are using ShortPixel, you need to install the ShortPixel AI for CDN and adaptive images.
Based on the plugin features, Smush Pro is a preferable option.
Phase 2: Installation and Settings
In this phase, we are going to give a brief description to use these plugins and the results you can expect. It helps to understand the ease of use and performance of both image optimisers.
ShortPixel IO
If you install ShortPixel IO, it will be accessible to you from the WP Plugins menu. From the list of installed plugins, click ShortPixel IO settings to get started.

On the settings page, you need to provide the API key. Enter your valid email address to get the API key from ShortPixel.
Once you provide the API key, you will get access to the ShortPixel dashboard with all dedicated features.
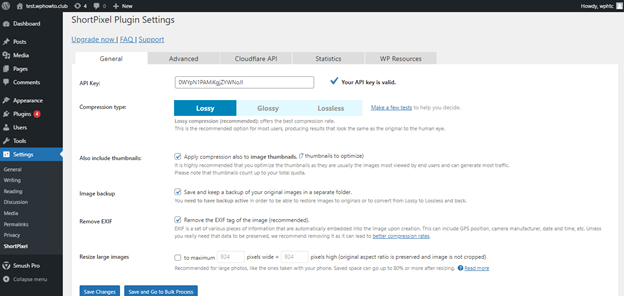
Choose any preferred general and advanced settings from the dashboard to optimize the images on your website. Click ‘Save Changes’ to start processing the images.
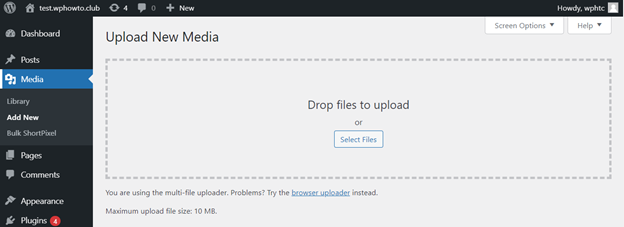
To upload an image, click ‘Add New’ option under ‘Media’ from the menu on the left.
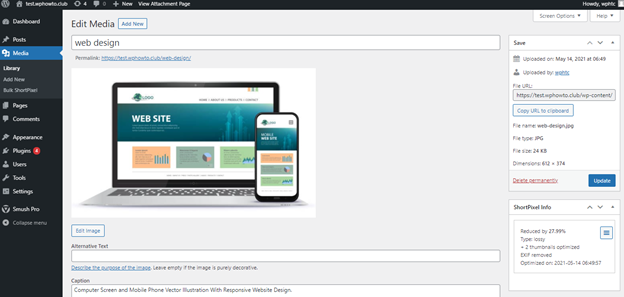
After uploading an image, you can click the ‘Edit’ option to start compressing your images.
On the ‘Edit Media’ page, you can add the necessary details and click ‘Update’ to save the changes.
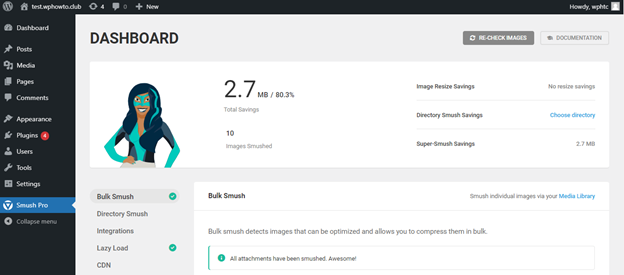
WP Smush Pro
After you install and activate Smush Pro, you will be directed to the Dashboard, where you can upload new images to the library.
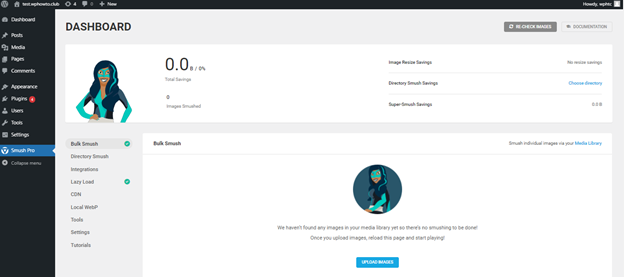
You may also scroll down the same page to the ‘Settings’ and configure the optimisation as needed.
The steps to upload the images and Smushing are the same as mentioned in the ShortPixel section. After you smush an image, you will get all the information of the image on the dashboard- size of the compressed image, number of images smushed, etc.
Verdict: There is not much difference in the installation, settings, image uploading, or processing on these two plugins. Once you activate the plugin with the API key, the rest of the process is seamless to perform with a few clicks.
Phase 3- ShortPixel vs. WP Smush Pro- User Interface
ShortPixel IO User Interface
We have judged the user interface of ShortPixel on 2 points:
- Clutter-free Dashboard
When you are working with plugin installation and settings, it is easy for beginners. The dashboard has only 5 menus at the top – General, Advanced, Cloudflare API, Statistics, and WP Resources.
You can easily browse through these and adjust the options as per choice, keep track of monthly limits, etc.
- Working with CDN and Adaptive Images
This is where we are stuck. The plugin can be a bit complicated for beginners. As already mentioned, IO does not support CDN and adaptive images, you must work with an additional AI extension. Here, you must take care to adjust the settings properly.
- Always set compression type to Lossless on the IO settings when you want to compress CDN images with AI. With any other settings, both the plugins will perform automatic compression while reducing the quality of the photos on the website.
- When using the AI module, you must disable the WebP on IO settings.
Smush Pro UI
With Smush Pro, you don’t need any other plugin to work with the images. The settings and options are easy to understand and adjust with a few clicks right from the dashboard. Work with the settings once and keep working with unlimited images as and when you want.
WP Smush Pro vs. ShortPixel- Plans and Pricing
Now that we have already provided a description of the essential features and the user guide to use both the plugins, it is our turn to compare the plans and prices.
Everyone has a budget and needs depending on the type and size of the website and other factors. Take a look into the plans to see what works best for your website:
ShortPixel IO Monthly Plans and Prices
| Sl.No. | Monthly Subscription | Facilities |
|---|---|---|
| 1. | Free | 100 images/month |
| 2. | $3.99/month | 55,000 images/month |
| 3. | $8.33/month | 16,000 images/month |
| 4. | $24.99/month | 55,000 images/month |
| 5. | $83.33/month | 220,000 images/month |
| 6. | $350/month |
|
| 7. | $500/month |
|
| 8. | $1000/month |
|
| Package Cost | Credits |
|---|---|
| $9.99 | 10,000 images |
| $19.99 | 30,000 images |
| $29.99 | 50,000 images |
| $99 | 170,000 images |
| $249 | 500,000 images |
WP Smush Pro Plans and Pricing
Smush Pro offers a simple pricing structure with 3 affordable monthly plans. There is no provision for buying one-time credits.

Don’t want to pay for a plan upfront?
As you already know, ShortPixel offers all premium features for up to 100 images per month. Try the free plan to check how well the module works on your website. As your website grows, you can subscribe to a paid plan based on the volume of images you need to optimise.
To process images from the global CDN, you may also install the ShortPixel AI plugin on your website. The free monthly plan allows up to 500MB of CDN traffic/month. It is suitable for websites with less than 500 monthly visits.
At Smush Pro, you can get a free trial for 7 days on all premium plans. So, you can try all the pro features first and then choose the plan that meets your needs.
ShortPixel IO vs. Smush Pro- User Ratings
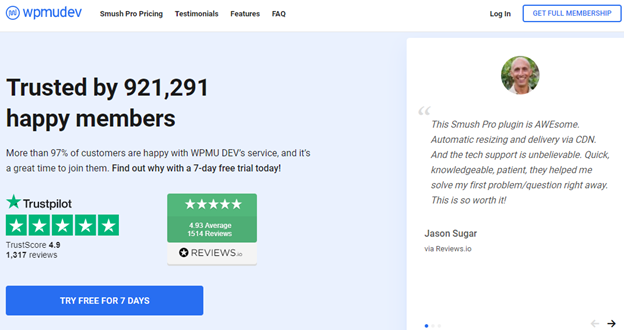
Customer support is one of those things that can be hard to gauge. My dealings with support on both platforms has been positive with WPMU Dev providing outstanding support well beyond the bounds of the Smush Pro plugin. I decided to compare the user experience on review sites as well. I found a few testimonials and ratings on ShortPixel, and it is generally well reviewed, but Smush Pro has an impressive 4.93 out of 5 ratings and 1500+ reviews on Trustpilot, well above what I could find for ShortPixel.
Conclusion
The size of image files is a crucial factor to determine the website loading speed. Using compression technology allows you to reduce image file sizes and achieve faster load speeds. With high-performing websites you can improve the user experience and gain more traffic while reducing bounce rates.
Both ShortPixel and Smush are powerful plugins with loads of features. There are several reasons Smush Pro is a better choice, particularly for big websites. However, if you own a new site and just want to work with a few settings at minimal cost, ShortPixel is a smart choice. A site with few images is easy to manage with this plugin. Having access to all the premium features for free as long as you want is also a big plus for small sites.
I hope this article has given you all the information you need to choose between these two leading image optimisation plugins and find the best image optimiser for WordPress.