WooCommerce is arguably one of the most extensive, powerful e-commerce platforms around, however, all this power under the hood also makes it more complex to set up and maintain. I’ve talked about this in length in detail over in this article, so I won’t go into that here, but one thing you can do to simplify your WooCommerce store management is to use a solid, WordPress optimised web host like Cloudways. Cloudways simplifies the hosting side of things and lets you launch a WooCommerce store that is optimised right from the get-go.
I’m a big fan of Cloudways as they give you the ability to choose from a number of cloud providers in locations all over the world, like Digital Ocean, Vultr, Google Cloud and AWS. They then manage the whole underlying server infrastructure so you don’t have to. Cloudways deploys a managed WordPress instance on top of the cloud server that is performance optimised and security hardened.
So, let’s get started!
Sign Up For A Free Cloudways Trial
First up, you need to sign up for a Cloudways account which comes with a free trial in the form of an account credit worth three days of hosting on a basic server.
>> Go to Cloudways and sign up for a free trial here
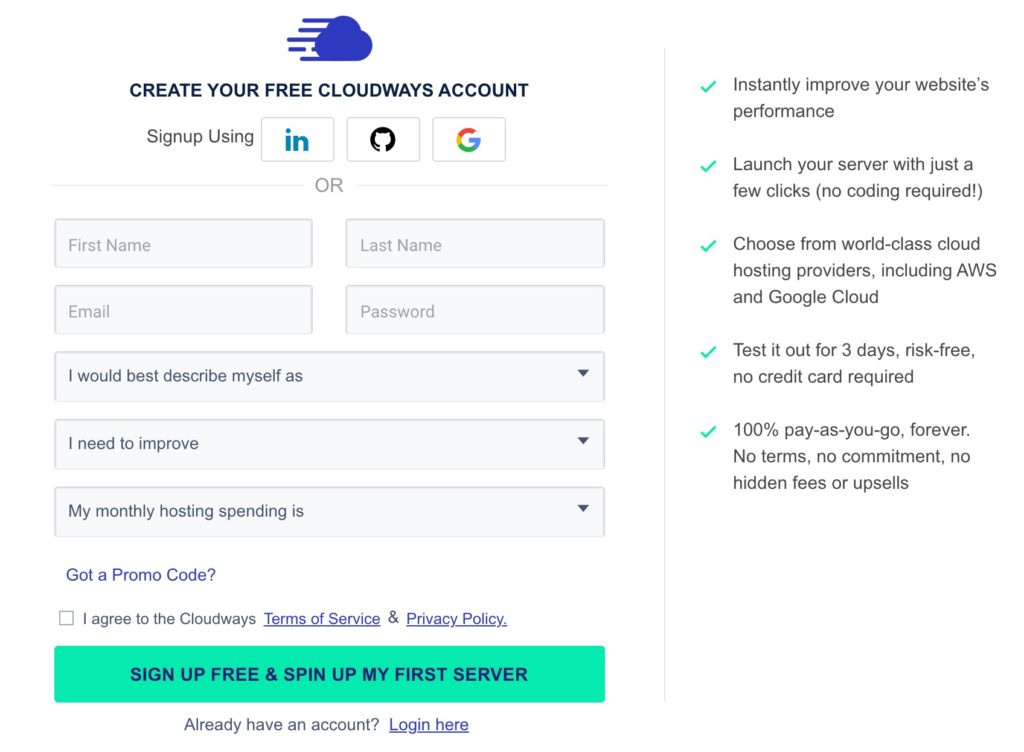
From the Cloudways home page, click one of the “Start Free” or “Get Started Free” buttons.

Next, fill out the initial signup form. There are no billing details required at this stage, just a First Name, Last Name, Email, Password and a few general information questions about you that help Cloudways send you the most helpful introductory email sequences for your needs.
Once you are done, agree to the Cloudways terms and privacy policy and click “Sign Up Free & Spin Up My First Server“.
Deploy A Server For Your WooCommerce Website With Cloudways
Once you have an account, Cloudways will guide you through the process of setting up your first server and a managed WooCommerce application.
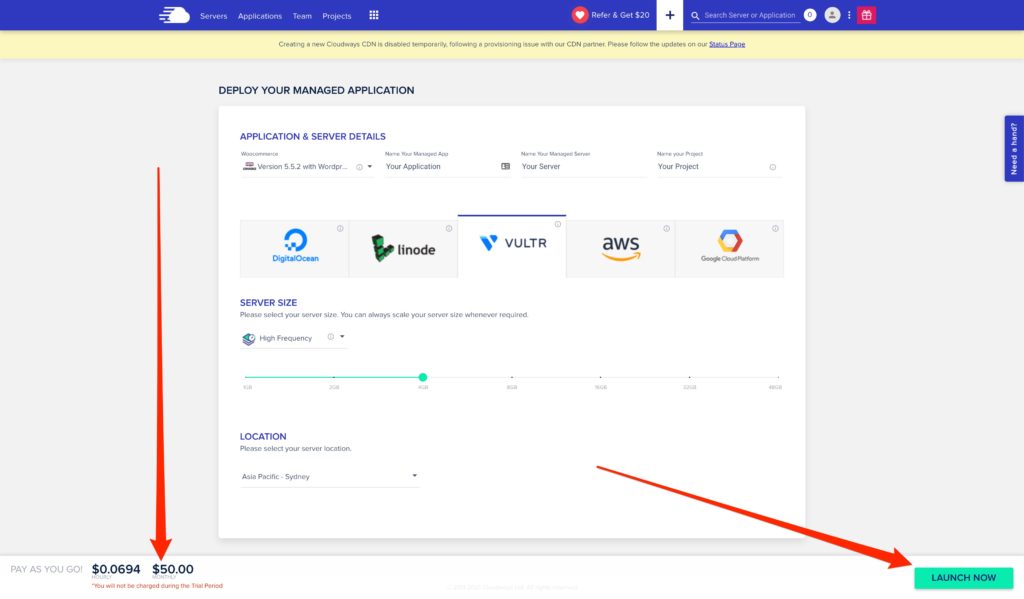
This screen may be a little daunting the first time you see it but it is an extremely simplified way of launching a WooCommerce website on a cloud server. Everything you need to choose from is right here on this one screen.
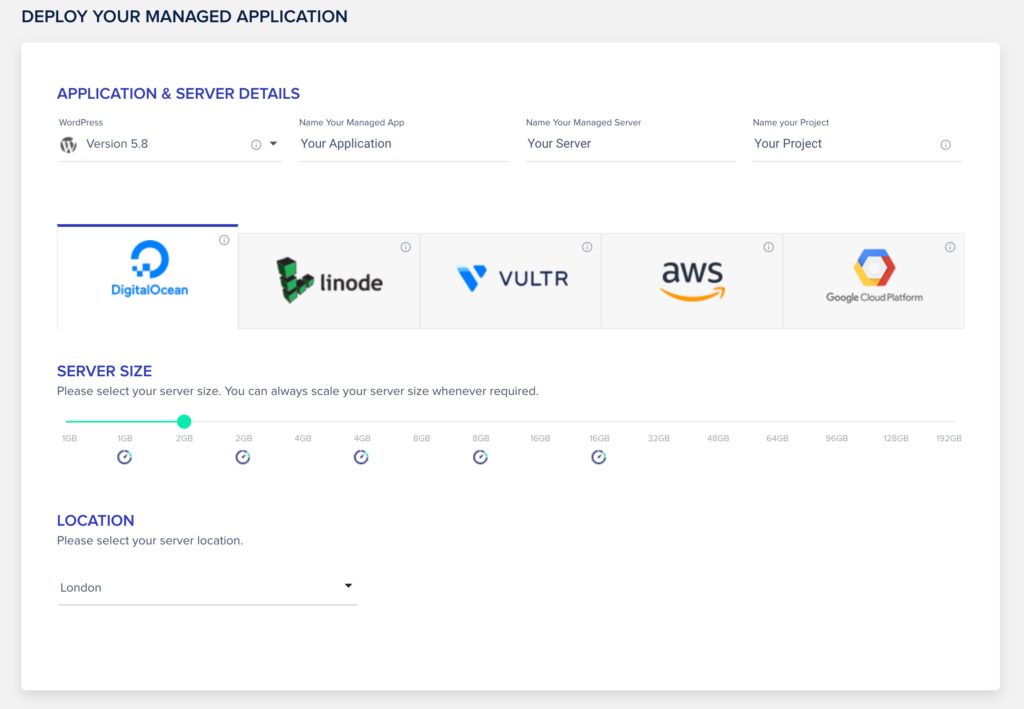
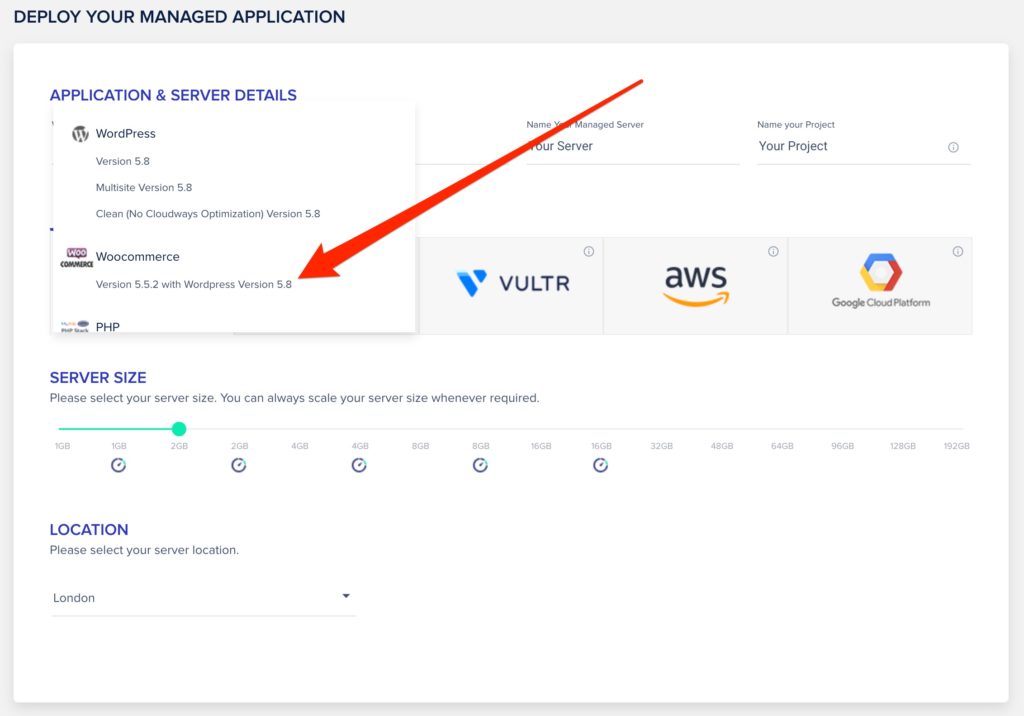
In the first box titled “WordPress”, select the latest version of WooCommerce and WordPress that is available.
The other fields along the top of this screen are all about identifying your server and application. Give them both a name. I personally like to name my applications with the domain name of the website that is running on the server. So for this website, I’d call the application wphowto.club as an example. For the Managed Server name, I usually base it on the name of the website that will be hosted on it, for example, WP How To Club. However, you can name them anything that makes sense to you.

The last option along the top is the name of the project. This is an internal tool that is helpful if you host multiple websites for different projects as you can grant access permissions to other users based on the project. Give your project a name that makes sense to you. You can always edit your application name, server name and project name later.
The next row is where you choose what cloud provider you want to use. Each one has pros and cons. It’s easy to move your website between providers later on if you need to, but the simplest comparison is this:
- Digital Ocean and Linode give you a simple all-in-one option where a server size increase will boost memory, CPU, storage and bandwidth simultaneously. These two have the fewest server locations, especially Digital Ocean.
- AWS and Google Cloud give you the ability to purchase bandwidth, file storage and database space based on your specific needs and choose from a variety of optimised cloud servers. These are great for more advanced users and those with very specific requirements, but, they will almost always work out more expensive. AWS and Google Cloud are not available in the trial
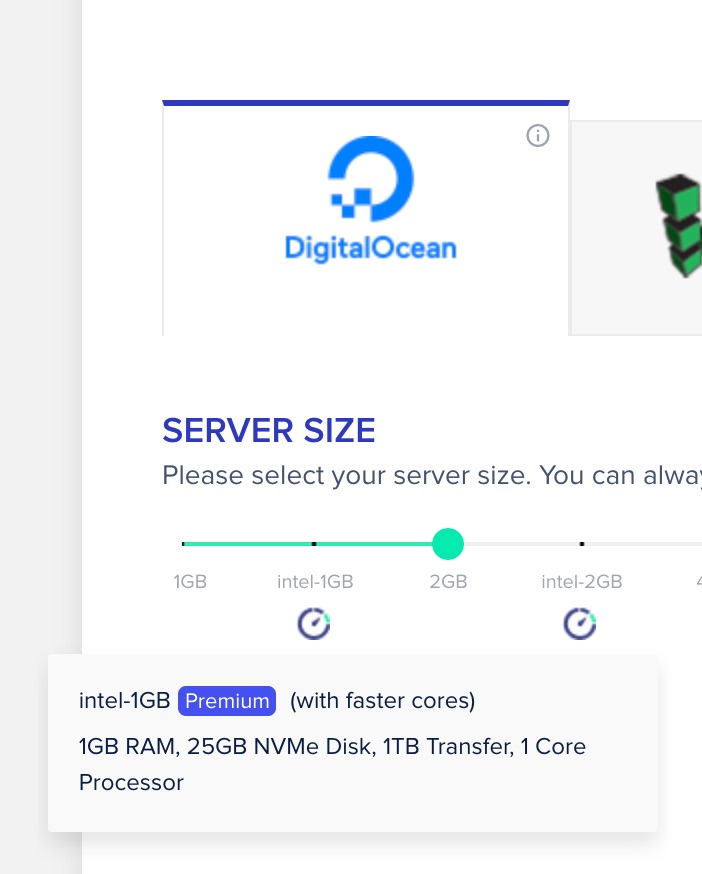
- Vultr is kind of in-between with an all-in-one option but you have the abiility to opt for standard processors or high-frequency processors that are perfect for WooCommerce websites. Digital Ocean has recently added a premium option that is similar to Vultr High Frequency. Vultr is my preferred option for most WordPress websites due to their large range of locations, including a Sydney Australia location.

The server size is where you choose your size which impacts the total memory available, CPU processing capability, storage, and bandwidth.
If you don’t know what you need, I’d recommend going with a Vultr High Frequency server for WooCommerce. This will give you the best balance of cost verse performance.
While you are working on the site, you can go with the smallest size, 1GB, but for a live WooCommerce site you will soon need to upgrade to at least the 4GB size. You can develop your site on the 1GB size and upgrade later to keep your costs down.
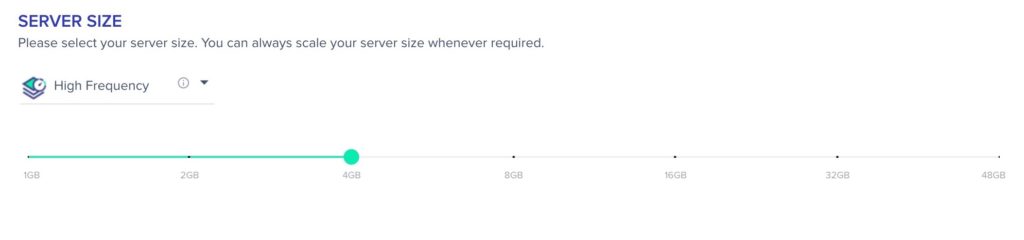
Hover your mouse cursor over any of the sizes for more detail about what memory, processor, storage and bandwidth is included with each size.
The last option is the server location. Locations vary between cloud providers. Some sizes may also be unavailable at certain times, if so, they will be greyed out. I recommend choosing a location that is geographically close to where you expect the majority of your website visitors to be. For example, if I think most of my visitors are located in Australia, I might choose a Sydney location.
If you don’t know, choose the location that is the closest to you. You can always move your site to another location later.

That’s it. Your new application and server details should look something like this.

The bottom left of the screen will show you your server cost both hourly and the estimated monthly cost.
Cloudways billing is hourly, so you aren’t locked into anything and once the free trial ends you only pay for the hours that your server is deployed.
Once you have everything set, you can deploy your server by clicking the “Launch Now” button on the bottom right of the screen.
The deployment process takes a few minutes up to 15 minutes and varies between cloud providers. You will be able to see the status and estimated time remaining for

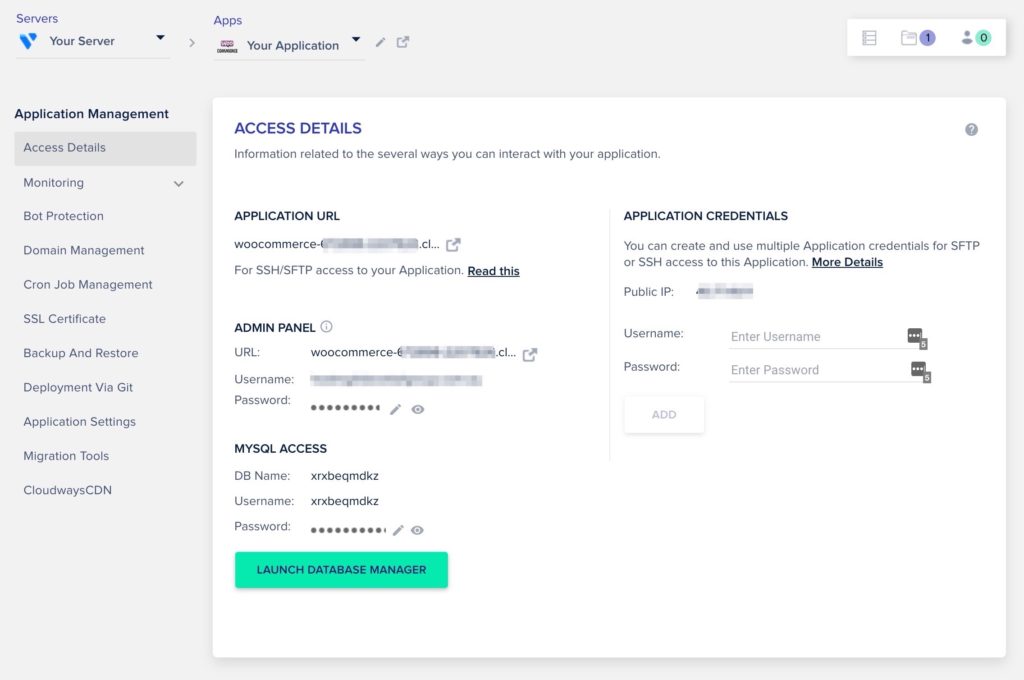
Access Your WooCommerce Website
Once your server is deployed you will be able to see all of your WordPress access details and jump into your WordPress admin to begin setting up your new WooCommerce store.
The longest part? The actual server deployment wait. The rest took just a few minutes to do.
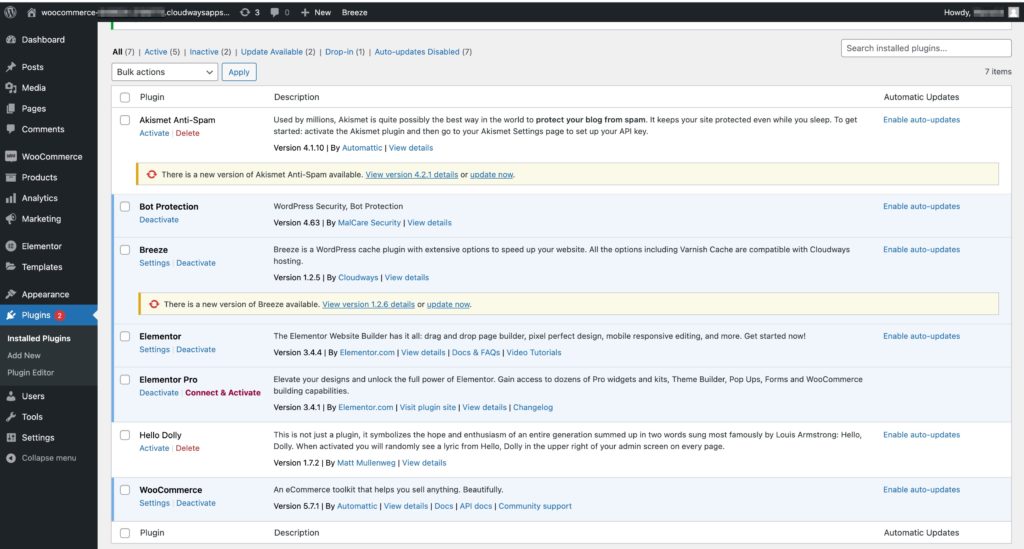
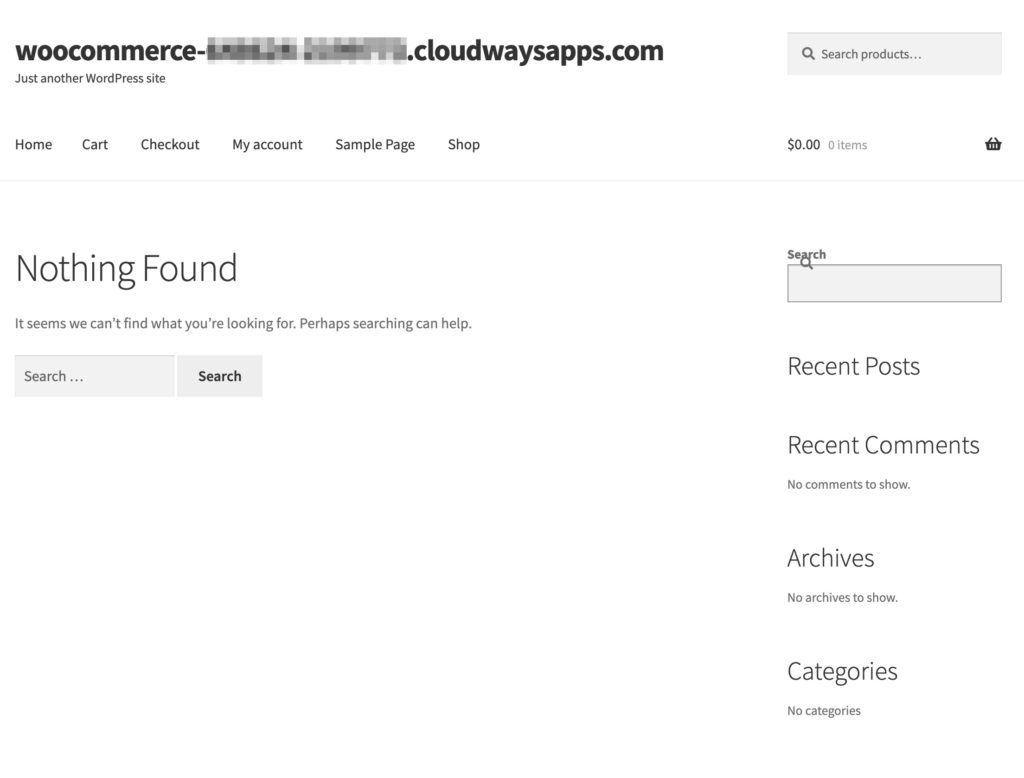
You’ll find WooCommerce is already installed along with the Cloudways Breeze caching plugin and Malcare malware protection plugin.
Connect Your Domain Name
If you have already got a domain name, you can now connect it up to your server. If you don’t have a domain yet, or you don’t want to point it to your WooComomerce store just yet, you can complete this step later.
Click the “Domain Management” tab on the left side of your server details screen.
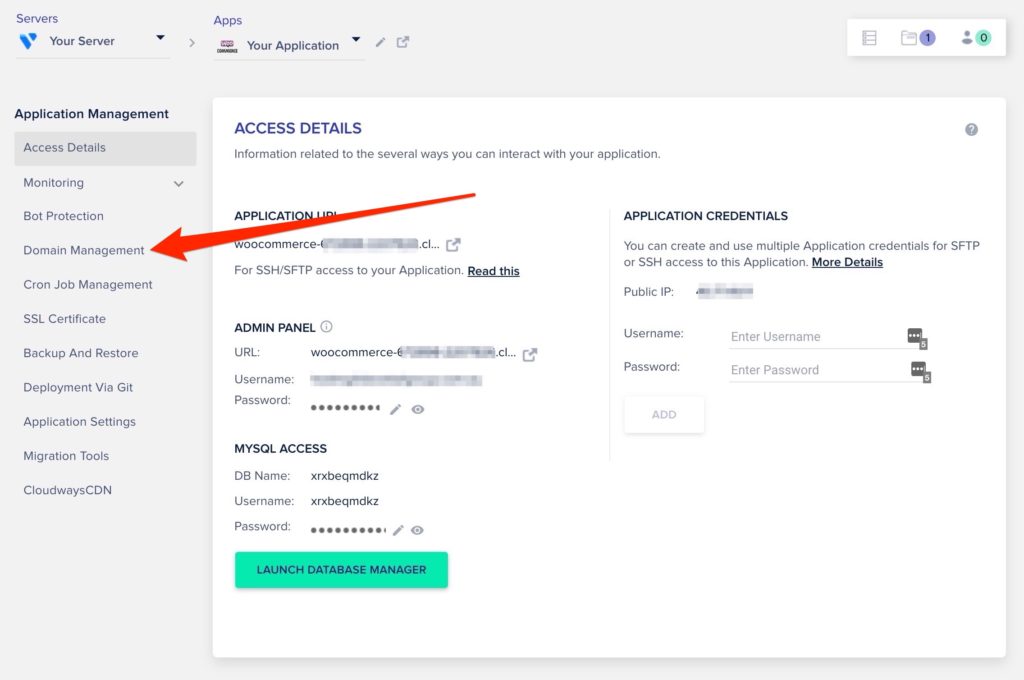
From the domain management screen, enter your domain name in the “Primary Domain” field and click “Save Changes“. If you want your website address to be something like https://www.example.com then enter www.example.com as the primary domain. If you don’t want to have the www at the start then just enter example.com.
Note: Once you enter the primary domain, you will no longer be able to access the server via the temporary .cloudwaysapps.com URL.
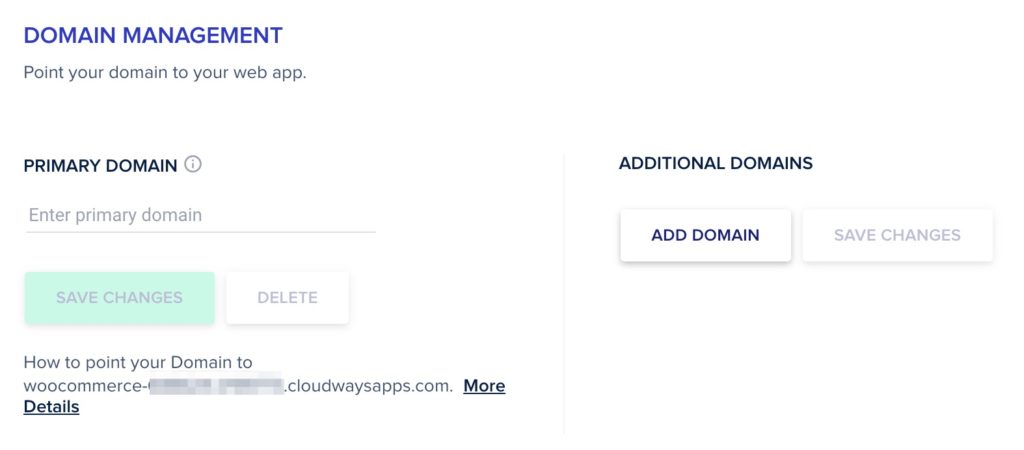
Whichever way you go, I suggest adding an additional domain for the other variation. So if you made www.example.com the primary domain, make sure to add example.com as the additional domain.
Additional domains will redirect to your primary domain so this makes sure that whichever way your visitors type in your website address, they still get to your website.
Now, go back to the “Access Details” tab to get your IP address. You will need to update the IP address for your website A records with your domain name registrar. This is a bit different between domain name registrars and is outside the scope of this article. However, once you complete this step, your domain name will now be pointing to your WooCommerce store on Cloudways!
You’re Done, Get Designing!
Get started on setting up your WooCommerce store and website! You’ll definitely want to install a theme as the default one is pretty bland!
I am a big fan of the lightweight GeneratePress theme and Elementor Pro for site design. GeneratePress is the theme that we’ve used on this website – and I use it. on most client websites as well because it is easy to customise and is very well optimised ensuring that it doesn’t add any bloat to your site. With the Premium upgrade, GeneratePress can be customised quite extensively without the need for a site builder plugin. However, for more extensive customisation, Elementor Pro makes designing and building your WooCommerce website super easy without needing any coding knowledge
So, get to it, customise your WooCommerce store and start selling!
Got questions? Let us know in the comments below!